

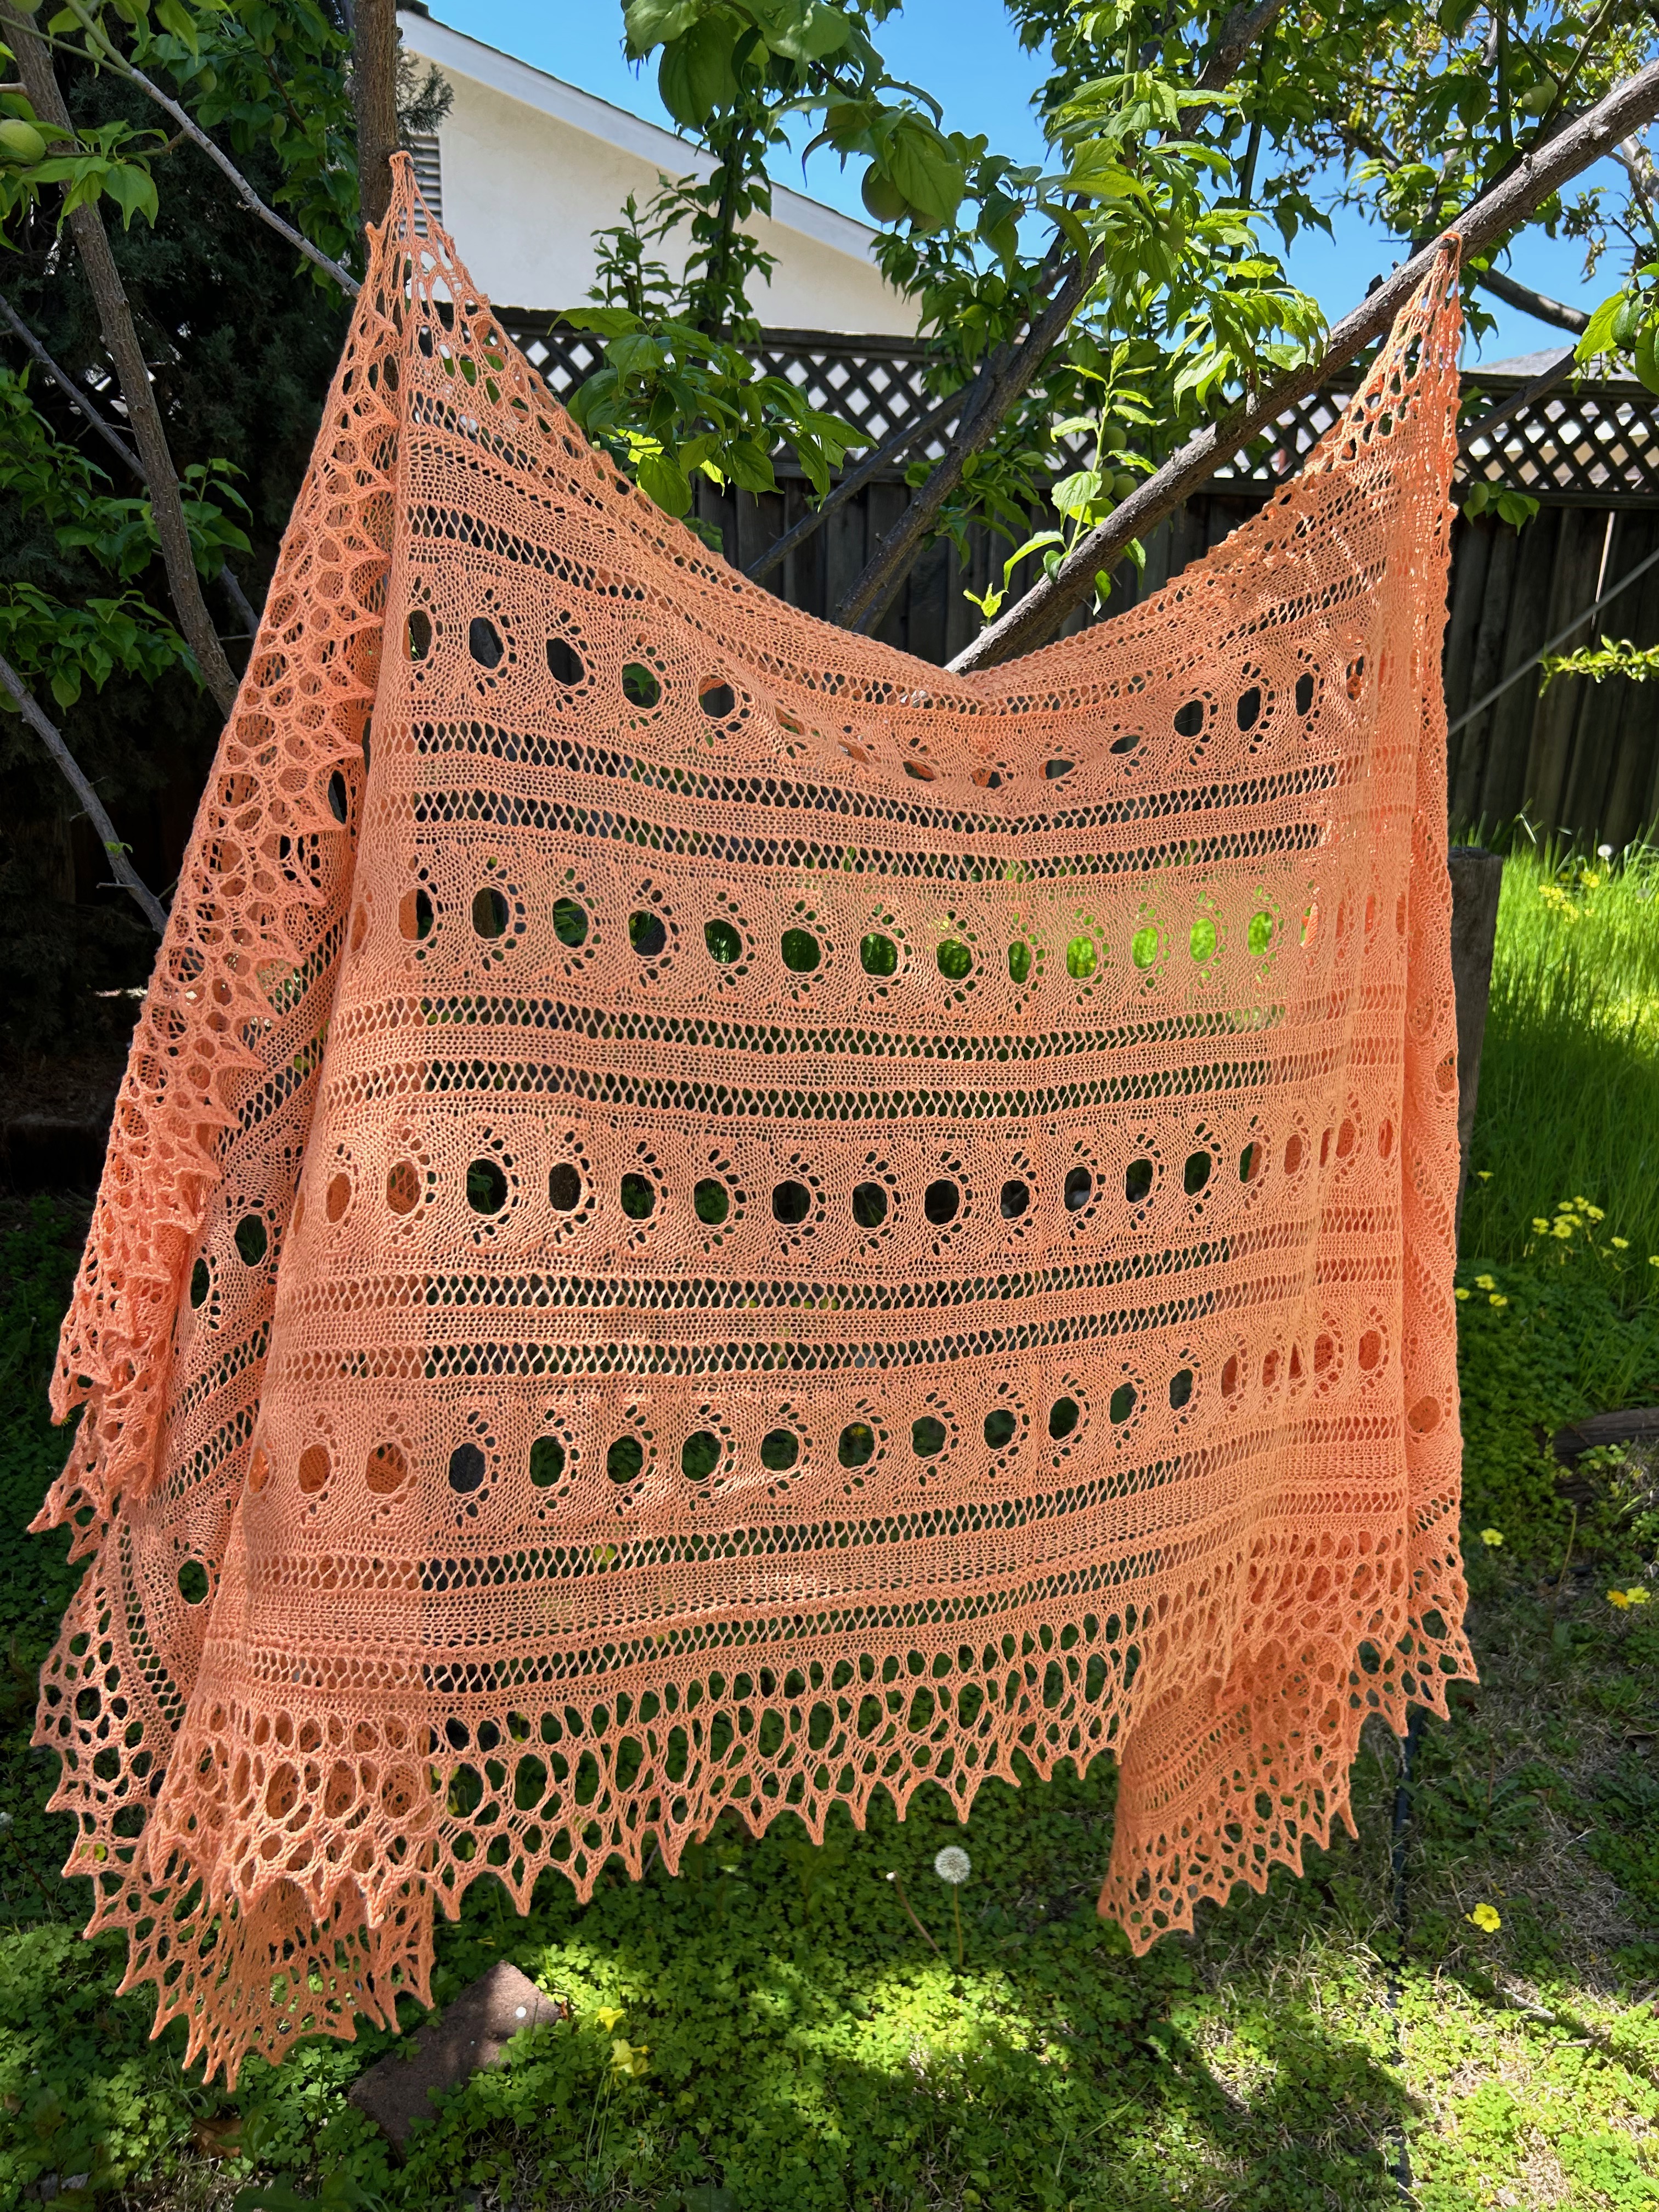
I usually have a knitting project in mind when I write it into one of my books, but Laura’s apricot-colored shawl just kind of appeared upon the page as I was writing the first scene of Lady Wynwood’s Spies, volume 4: Betrayer, and it surprised even me.
I immediately went to my yarn stash to find a yarn for it, and I searched through my antique knitting books to find some stitch patterns. I made her an elegant wool shawl she could wear at home.
The shawl ended up tagging along with Laura into the next book, Lady Wynwood’s Spies, volume 5: Prisoner, where it imparts some comfort to her in her trying circumstances.
The two stitch patterns are both from the same book, The Lady’s Assistant, volume 2 by Mrs. Jane Gaugain, published in 1842. A couple excessively clever and creative knitters might have knit these patterns in the Regency era, but they would have only passed them around by word of mouth or scribbled “recipes” to friends or family, and it wouldn’t have been widely used. So my using them for Laura’s shawl is perhaps stretching things because they’re probably not authentically from the Regency period, but they’re beautiful and I couldn’t resist.
The central lace pattern is called “Very Pretty Sort of Shell,” stitch pattern number 108 in the book, on page 199.
For the edging, I decided on another nautically named lace pattern, “Scollop Edging, in imitation of Brussels Lace,” stitch pattern number 38 on page 137.
I adjusted both stitch patterns a little from the originals, and corrected a couple errors.
I also made this pattern into a PDF, which you can download here.

Size:
74” long, 32” wide
I blocked the shawl a bit aggressively because I was aiming for an airy, delicate shawl that my character, Lady Wynwood, would wear in her elegant drawing room. It would have still looked pretty blocked to only 60” long and 24” wide.
For a modern woman, this would be a lovely shawl to wear to a wedding or perhaps a daytime semi-formal event, because it’s lacy, long and sweepingly dramatic.
If you would like the shawl to be smaller, you can block it to smaller dimensions and/or change the needle size to something like US 2 or US 3 (you’ll need to do a couple test swatches). Once blocked, it would be shorter and narrower, but still have the four repeats of the shell lace pattern in the center.
Yarn:
Knit Picks Gloss Lace (70% Merino Wool, 30% Silk, 440 yards/50 gram ball), 4 balls, Mango colorway (24202) lot# 51224
Needles:
US 5 (3.75 mm) circular needles
US 5 (3.75 mm) double-pointed needles
Gauge:
One repeat of Shell lace pattern (24 stitches, 12 rows) is 6.5” wide and 2” tall when blocked, or 3.7 stitches and 6 rows per inch.
Abbreviations:
k = knit
p = purl
k2tog = knit two together
p2tog = purl two together
YO = yarn over
A = slip one, purl two together, pass slipped stitch over
Instructions:
With US 5 circular needles and waste yarn, cast on 105 sts using provisional crochet cast on (it will be 104 sts after removing the waste yarn).
First row: slip first stitch purl-wise with yarn at wrong side, k2tog, knit across (to make 104 sts).
Slip first stitch purl-wise with yarn at wrong side in every row and knit 7 more rows for garter stitch bottom border. Then start shell pattern for center panel.
Slip first stitch purl-wise with yarn at wrong side in every row and knit a 4-stitch garter stitch border at each end.
Each row: slip 1, k3, (Shell pattern) 4 times, k4.
Shell pattern:
1 (RS): k3, YO, k2tog, k1, k2tog, k4, YO 5 times, k4, k2tog, k3, YO, k2tog, k1
2: p3, YO, p2tog, p1, p2tog, p4, k1, p1, k1, p4, p2tog, p3, YO, p2tog, p1
3: k3, YO, k2tog, k12, k2tog, k3, YO, k2tog, k1
4: p3, YO, p2tog, p16, YO, p2tog, p1
5: k3, YO, k2tog, k4, YO, k1, YO, k1, YO, k1, YO, k1, YO, k1, YO, k1, YO, k1, YO, k5, YO, k2tog, k1
6: p3, YO, p2tog, p1, p2tog, p15, p2tog, p4, YO, p2tog, p1
7: k3, YO, k2tog, k1, k2tog, k14, k2tog, k3, YO, k2tog, k1
8: p3, YO, p2tog, p1, p2tog, p12, p2tog, p3, YO, p2tog, p1
9: k3, YO, k2tog, k1, k2tog, k10, k2tog, k3, YO, k2tog, k1
10: p3, YO, p2tog, p16, YO, p2tog, p1
11: k3, YO, k2tog, k16, YO, k2tog, k1
12: p3, YO, p2tog, p16, YO, p2tog, p1
Knit a total of 33 repeats of Shell pattern.
Slip the first stitch of every row and knit 8 rows for garter stitch top border (104 stitches).
Break yarn.

Edging:
You will be knitting the edging onto the center panel, going in a clockwise direction, and starting a few rows up from the bottom left corner of the center panel.
With the right/front side of the shawl facing you, on the long left edge, count 8 slipped stitches from the bottom left corner (do not count the provisional stitch), then put a stitch marker on the 9th slipped stitch.
When knitting the edging, on wrong side rows (even rows), you will attach the edging to the shawl starting at that marked stitch.
With US 5 double-pointed needles, cast on 20 sts using provisional crochet cast on and waste yarn (will be 19 sts after removing waste yarn).
First row (right side): slip first stitch purl-wise with yarn at wrong side, k2, YO, k2tog, k13, k2tog (to make 19 stitches)

Start Scollop edging pattern version 1 STARTING FROM ROW 2.
Scollop edging pattern version 1:
1 (right side): slip 1, k2, YO, k2tog, k14
2 (wrong side): p2, (YO 2 times, p2tog) 5 times, p4, YO, p2tog, slip last stitch, pick up one stitch from shawl, pass slipped stitch over
3: slip 1, k2, YO, k2tog, k1, k2tog, k1, p1, (k2, p1) 4 times, k2
4: p20, YO, p2tog, slip last stitch, pick up one stitch from shawl, pass slipped stitch over
5: slip 1, k2, YO, k2tog, k18
6: Bind off 6 stitches purlwise (you will have 1 st on the right hand needle), YO 2 times, A, p1, YO 4 times, A, p1, YO 2 times, p2tog, p3, YO, p2tog, slip last stitch, pick up one stitch from shawl, pass slipped stitch over
7: slip 1, k2, YO, k2tog, k3, p1, k2tog, (k1, p1) 2 times, k3, p1, k1
8: p16, YO, p2tog, slip last stitch, pick up one stitch from shawl, pass slipped stitch over
A = slip one, purl two together, pass slipped stitch over
Repeat Scollop edging pattern from row 1.

Knit Scollop edging pattern version 1 a total of 47 times along the long side. On the center shawl panel, there should be 9 slipped stitches remaining on the edge until the corner of the shawl.
(If you find you have too few or too many stitches before each corner, that’s totally fine, just fudge the Double Join (DJ) and Single Join (SJ) at the corner. All that matters is the number of repeats of the edging that you knit. You need to do 47 repeats along each long side, 19 repeats along each short side, and 6 repeats at each of the four corners for a total of 156 repeats of the edging around the outside of the shawl. Of course, if you decided to do less or more than 33 repeats of the shell pattern in the center, then the number of edge stitches on the center panel will also change, and you’ll have to do more or less repeats of the Scollop edging, as well as fudge the DJ and SJ.)
For the corners, you will be doing Single Joins (SJ) and Double Joins (DJ), which are both terms I borrowed from the book Victorian Lace Today by Jane Sowerby.

Single Joins: These are simply what you are already doing on every even row of the edging pattern.
When adding the edging to the long edge of the center panel, where there are slipped stitches along the sides: Follow the edging pattern to the last stitch of the row, slip the stitch, pick up a stitch from the center panel, and pass the slipped stitch over.
When adding the edging to the short end of the shawl, where there are the live provisional stitches: Follow the edging pattern to the last stitch of the row, slip the stitch, slip the live stitch from the center panel, then knit both slipped stitches on the right hand needle through the back loops.
Double Joins: There are two even numbered rows indicated for the double join. For the first row, do a normal single join.
For the second row, when doing the long side of the shawl, pick up a stitch through the same stitch as the previous row and slip the passed stitch over.
When doing the short side of the shawl, knit the last edging stitch through the same center panel stitch as the previous row.
When turning the corner from a long edge to the short edge of the shawl, you will do 2 SJ and 7 DJ on the long side, then do 4 DJ on the short side. This is called corner A.
When turning the corner from the short edge to the long edge of the shawl, you will do 5 DJ on the short side, then do 6 DJ and 2 SJ on the long side. This is called corner B.

Corner A (going from long side to short side):
Long side:
Row 2-SJ
Row 4-SJ
Rows 6,8-DJ
Rows 2,4-DJ
Rows 6,8-DJ
Rows 2,4-DJ
Rows 6,8-DJ
Rows 2,4-DJ
Rows 6,8-DJ
Short side:
Rows 2,4-DJ
Rows 6,8-DJ
Rows 2,4-DJ
Rows 6,8-DJ

On the short side, after doing the DJ for corner A, you will have 100 live stitches left. You will be knitting the Scollop edging pattern version 2.
Scollop edging pattern version 2:
1 (right side): slip 1, k2, YO, k2tog, k14
2 (wrong side): p2, (YO 2 times, p2tog) 5 times, p4, YO, p2tog, slip last stitch, slip one live stitch from the center panel, then knit the two stitches on the right needle together through the back loop
3: slip 1, k2, YO, k2tog, k1, k2tog, k1, p1, (k2, p1) 4 times, k2
4: p20, YO, p2tog, slip last stitch, slip one live stitch from the center panel, then knit the two stitches on the right needle together through the back loop
5: slip 1, k2, YO, k2tog, k18
6: Bind off 6 stitches (you will have 1 st on the right hand needle), YO 2 times, A, p1, YO 4 times, A, p1, YO 2 times, p2tog, p3, YO, p2tog, slip last stitch, slip one live stitch from the center panel, then knit the two stitches on the right needle together through the back loop
7: slip 1, k2, YO, k2tog, k3, p1, k2tog, (k1, p1) 4 times, k3, p1, k1
8: p16, YO, p2tog, slip last stitch, slip TWO LIVE STITCHES from the center panel, then knit the two stitches on the right needle together through the back loop
Repeat Scollop edging pattern from row 1.
*** NOTE that for row 8, you will be knitting the last edging stitch together with TWO stitches from the center panel, not one. This is to prevent the edging from bunching up too much along the short edges of the shawl when blocking.

After doing corner A, repeat Scollop edging pattern version 2 a total of 19 times. You will have 5 stitches left before the corner. Do corner B.
Corner B (going from short side to long side):
Short side:
Rows 2,4-DJ
Rows 6,8-DJ
Rows 2,4-DJ
Rows 6,8-DJ
Rows 2,4-DJ
Long side:
Rows 6,8-DJ
Rows 2,4-DJ
Rows 6,8-DJ
Rows 2,4-DJ
Rows 6,8-DJ
Rows 2,4-DJ
Row 6-SJ
Row 8-SJ
After doing corner B, knit Scollop edging pattern version 1 a total of 47 times along the long side. On the center shawl panel, there should be 9 slipped stitches remaining on the edge until the corner of the shawl.
Do corner A.

After doing corner A, repeat Scollop edging pattern version 2 a total of 19 times along the short side. You will have 5 stitches left before the corner. Do corner B.
You should end where you started. If you’re off by a few stitches, fudge the SJ and DJ so that you end on the slipped stitch just below where you started on the left long side.
Undo the provisional cast on for the Scollop edging, and kitchener stitch the cast on stitches to the live stitches. If you don’t like doing kitchener stitch, you can instead do a 3-needle bind off.
Wash and block the shawl, then weave in the ends.
If you enjoy Regency intrigue, Christian suspense, and romantic chemistry wrapped in danger, you’ll love the Lady Wynwood’s Spies series. Start with Volume 1: Lady Wynwood’s Spies: Archer, where the story (and the secrets) begin.
👉 Read a free extended excerpt of Volume 1
👉 Or buy Book 1 now and dive in


Comments